Writeups for MetaCTF 2020
crypto web26 Oct 2020
13 minute read
My cybersec team Pwnzorz participated in MetaCTF this weekend. It was a really nice experience and our first CTF in a while. We managed to rank #4 on the student leaderboard and #7 overall 1.
These are my writeups for challenges I enjoyed solving :).
[The challenges are not available yet on the server so I don’t have the problem description.]
Web #
Barry’s web server #
http://host1.metaproblems.com:5620/dev/webapp/index.html we’re given this link.
Fiddling with the url gives the flag:
``MetaCTF{sne@ky_red1rect_troubl3makers}`
Careless Redirects #
Now when we open the SSO portal from the fileshare, we can try and access the HR portal. If you pay attention to the network requests, you’ll see that it’s calling login.php with two parameters, the username and an empty key. We know the admin user is just admin because of the fileshare email. So we redo the request with the admin username and since they don’t check keys, we get the flag:
Vulnerability through customizability #
Now this was one of my favourites, and it was pretty fun to solve. We’re given a backup of the target website hosted here. The website is pretty simple, with pretty much the only interesting functionality being the search bar.
The backup is obviously wordpress source code, so now we’ve got to find what makes this code different. Here’s the basic structure:
~/D/t/html ls
index.php wp-activate.php wp-comments-post.php wp-content/ wp-links-opml.php wp-mail.php wp-trackback.php
license.txt wp-admin/ wp-config.php wp-cron.php wp-load.php wp-settings.php xmlrpc.php
readme.html wp-blog-header.php wp-config-sample.php wp-includes/ wp-login.php wp-signup.php
I have almost no experience with php/wordpress, but I needed to find the wordpress version of this source code so I could compare it to the official wordpress source code of that version.
In wp-includes/version.php. we find this useful line of configuration:
$wp_version = '5.4.2';
We have our version. Now let’s download wordpress 5.4.2. I found the source on their github repo.
To compare these two directories with our website backup and the actual wp source, let’s use diff. It’s a builtin unix tool to compare files / directories. Let’s run this command:
diff -r html/ WordPress-5.4.2/ > out
This -r (recursively) compares the directories and prints the output to an out file.
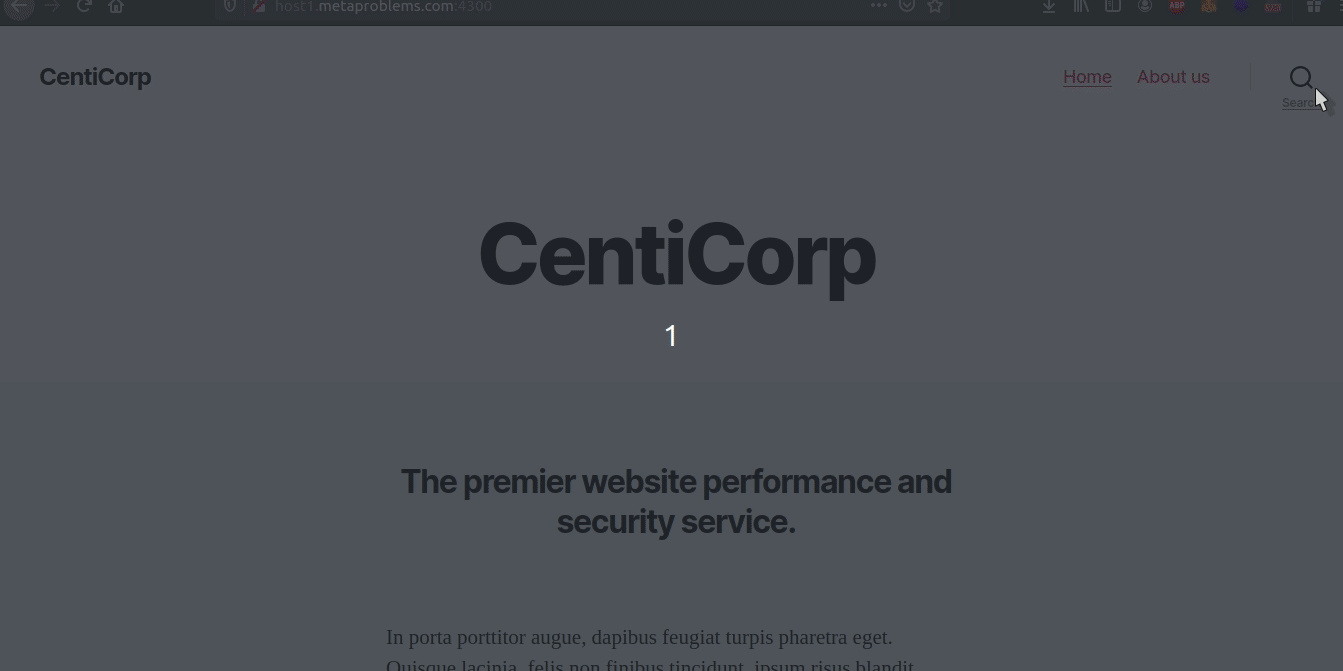
This brings our attention to the wp-content/themes/twentytwenty/index.php that handles the search for the website. Indeed it has been modified and introduces a new concept, the idea of a $custom_query variable and so custom search. Remind you of something? Look back at the title. On top of that, the code is a customization of the theme.
Let’s go through this php code:
First off, if the query at http://host1.metaproblems.com:4300/?s=query starts with uptime or status it becomes a “custom_query”:
    $query = get_search_query();
    $custom_query = false;
    if (substr($query, 0, 6) === "status" || substr($query, 0, 6) === "uptime") {
        $custom_query = true;
    }
Let’s skip to this custom section. The centicorp service supposedly gets the uptime for websites, so it tries to extract a keyword that could be a url. It also checks:
$local = in_array("local", $params);
If local is in the query, it’ll also have a different behavior. Let’s see what happens if it is local:
            $aliases["cc_sys_ram"] = ["ram", "memory"];
            $aliases["cc_sys_disk"] = ["disk", "drive", "space", "hdd", "ssd", "storage"];
            $aliases["cc_sys_cpu"] = ["cpu", "processor", "usage"];
            $lookup = $target;
            // here it uses the aliases as a way of mapping our query to one of the cc_sys_ram, cc_sys_disk, ...
            // so if our query contains "ram", it'll become cc_sys_ram
            foreach ($aliases as $key => $value) {
                if (in_array($target, $value)) {
                    $lookup = $key;
                }
            }
What it does here is that it maps a few rules to map your query to well-defined searches. So if we search for ram, it’ll replace that with an alias cc_sys_ram. Once it has parsed our query this way it does something VERY interesting:
            // now it checks if our $lookup is contained in $_STATUS
            if (array_key_exists($lookup, $_STATUS)) {
                echo '<div class="archive-subtitle section-inner thin max-percentage intro-text">'.$lookup.': '.$_STATUS[$lookup].'</div>';
            }
It seems to be trying to be getting something from the $_STATUS variable. Let’s try using their example of searching for ram:
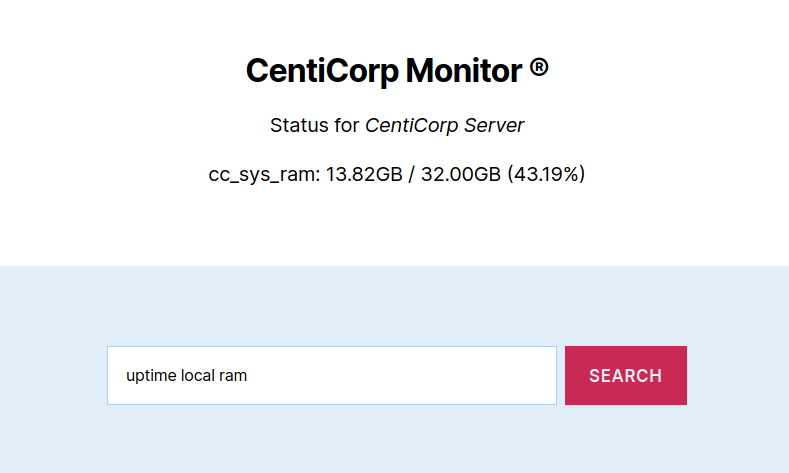
Interesting, so we can get some information if we pass the right keyword in the form (status|uptime) local <keyword>. You can try with any of the other aliases and we get other trivial results. These examples show us we can retrieve data. But where is $_STATUS defined?
We can go back to our diff and we’ll find this in wp-settings.php:
foreach ( $_ENV as $key => $value ) {
    if ( strlen($key) > 6 && preg_match( '/.*_.*/', $key ) )
    $_STATUS[strtolower('cc' . '_' . $key)] = $value;
}
This code is basically parsing the php env variables and exposing them in a global name status with cc_ prefixed. This means we can basically read the env variables that were set to run the server.
We’re almost there! A bit of digging showed me that the code does call some env variables in wp-config.php:
define( 'DB_NAME', getenv('DB_NAME') );

/** MySQL database username */
define( 'DB_USER', getenv('DB_USER') );

/** MySQL database password */
define( 'DB_PASSWORD', getenv('DB_PASSWORD') );

/** MySQL hostname */
define( 'DB_HOST', getenv('DB_HOST') );
We saw that it lowercases the var and prefixes it, so let’s try searching for these while keeping these details in mind:
Aha! The flag was thus stored in the db_password env variable, and reading through modified source code allows us to spot this behaviour and get the flag.
MetaCTF{if_you_see_this_the_devel0per_messed_up}
Joy with Tokens #
We have a (somewhat buggy website) http://host1.metaproblems.com:4200 and we’re instructed to look for JWTs to hack (somehow?). We’re also told to try and hack the admin user of which the email is admin@joywithtokens.metaproblems.com. A JWT (JSON Web Token) 2is an authentication method for the web. Understanding their structure is important. When you register and login, the mechanism they seem to be using is a cookie with a hash value, but not the structure of a JWT:

This is how they remember across your requests.
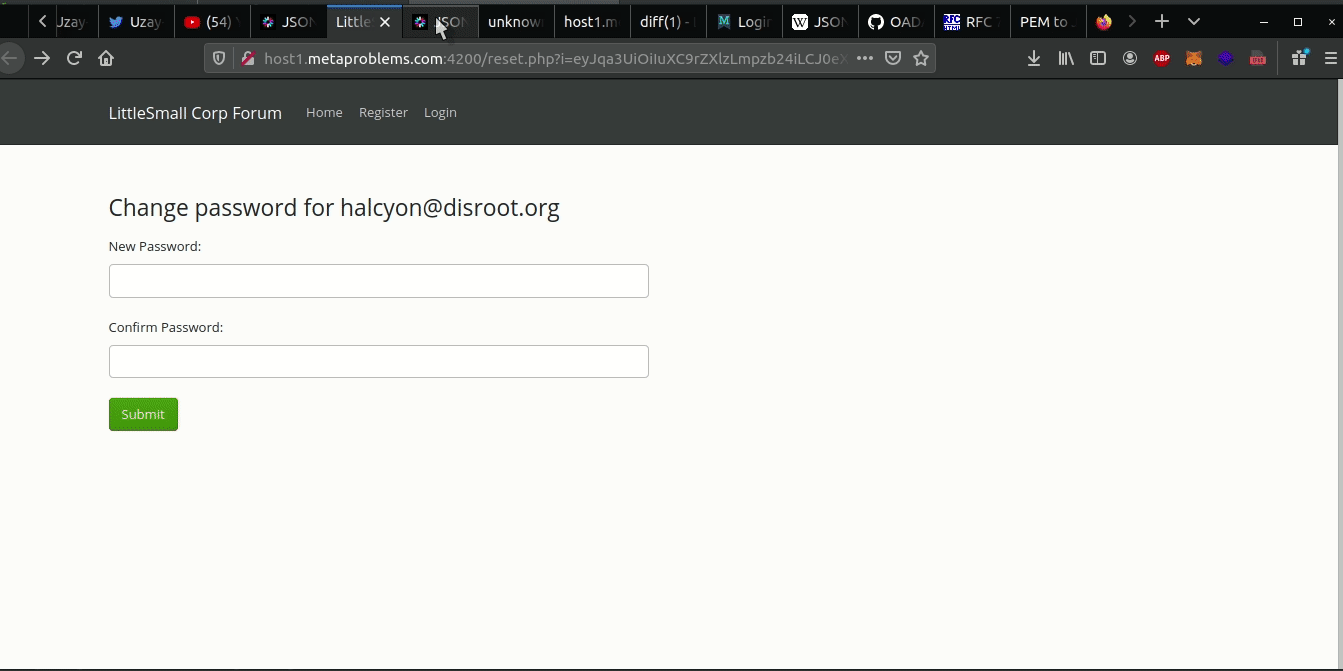
Let’s try to get our JWT. Let’s look at the reset password page. If you reset the password of your account with your email set to a real email you will actually receive someting in your inbox like this:
A password reset has been requested for your account. If this was you, please click here to reset your password
The link is like this:
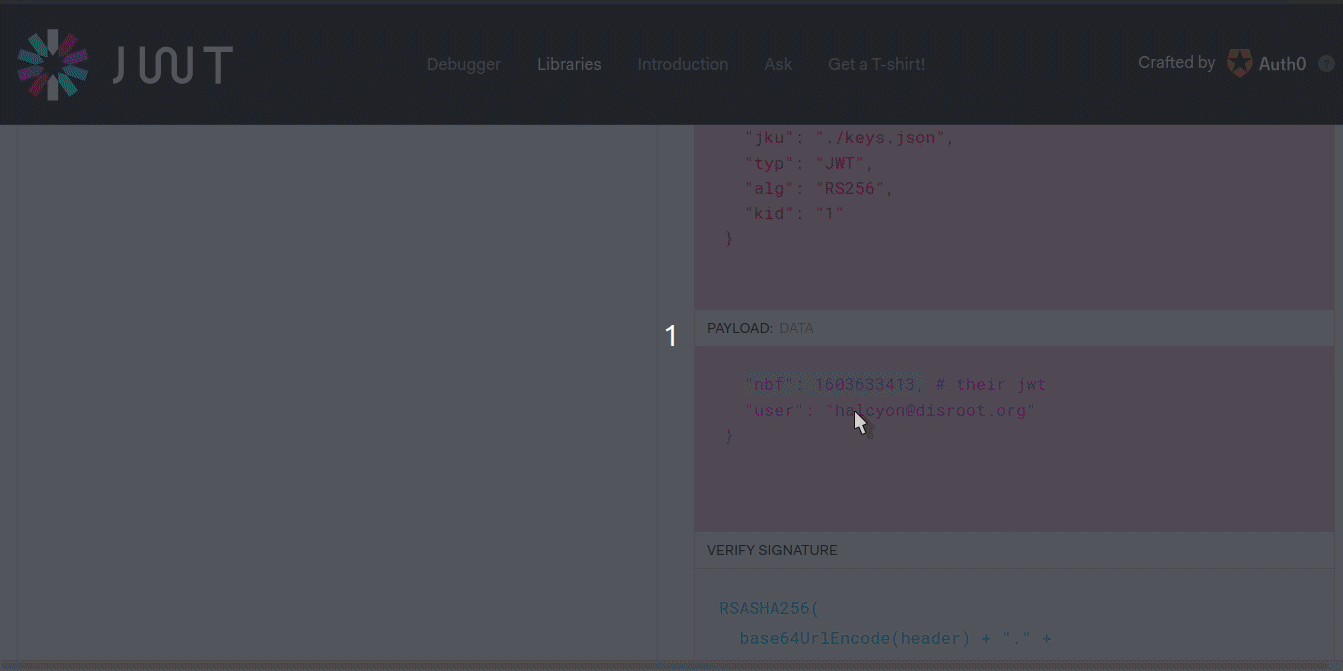
http://host1.metaproblems.com:4200/reset.php?i=eyJqa3UiOiIuXC9rZXlzLmpzb24iLCJ0eXAiOiJKV1QiLCJhbGciOiJSUzI1NiIsImtpZCI6IjEifQ.eyJpYXQiOjE2MDM2MzM0MTMsIm5iZiI6MTYwMzYzMzQxMywidXNlciI6ImhhbGN5b25AZGlzcm9vdC5vcmcifQ.PR7drMJ_PT5yY6whZPSUR9dKB3kycwzUrT3zBPkGGsuQ0ObD6X5hUl2D6ReiAgH_JBLbhCpAvhdKh455lZZfUR8yFNxkywmSPeaPjeLGO-HC_Fhwq46tF_7QdDuDuDA69nj3-0z_kVq-z8ni28zeohEYnly-q-AiD7VyaYzPeABa_oi_ZUDvhg5UTuGDEzPws87O0rxJktYyKCvhyE4KZ3_4oF0n2rB_3_jBPSq-EwAjEs5KUr4ZiwxVYMb8VQo066f6RDAtumuIagvIuiyDb5hDCeU2en0uLiR5YsTvEidKVQS9_t2UP3JR1uq7V5zAgzJ6trJQrvnNAFpSjUsfEw
Well that huge request parameter is a JWT! yay! Let’s decode it using this awesome resource (paste the jwt into Encoded)
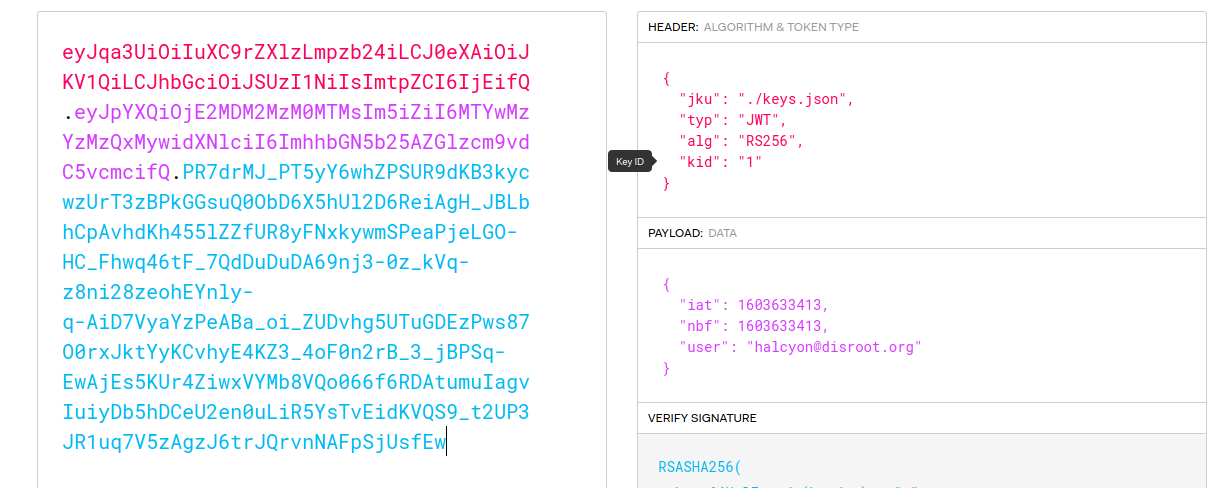
So it stores our email - what if we could change the value of our email to the admin’s and trick it like that? Well although we can edit the value of a JWT, they are signed with a private key that verifies their integrity. Without access to the key, we can’t change anything…
If we pay attention, we can see that there is this interesting jku datapoint. This actually tells the JWT implementation where it can find the publickey used for the JWT. This is pretty useless for us for now because we need access to the private key to encrypt the data. But we can observe the structure of this keyfile that is public. On top of this, the path uses ./ notation which indicates it’s a relative path to the json file.
If you’ve paid attention to the website, you might have noticed that there is the possibility to upload a profile pic. We’ll use this to execute this exploit:
We will generate our own private/pub key and store the public key in our own keys.json file. We’ll upload this as our profile pic and then all we have to do is create a new JWT encrypted with the private key we generated. This jwt will set the jku value to the point of the json file we uploaded and it’s email will be set to, you guessed it, the admin user’s.
Let’s start with generating our keys using openssh:
ssh-keygen -t rsa -b 2048 -m PEM -f private.pem # generates private key
ssh-keygen -f private.pem -e -m PEM > public.pem # public key
Now let’s create our keys.json file based on them. This keyfile actually follows an RFC called the JSON Web Key format. We need to conform to this specification and convert our keys appropriately. Paste the contents of your private key into this tool and copy the corresponding JWK.
Now if we look back to the website’s keys.json, there are several keys with a kid-> key id, Let’s just copy this file and replace the contents of both keys with our newlyfound JWK. We can also note that their JWK only have values for n and e so that’s all we need. In the end I got this file:
{
  "keys": [
    {
      "kty": "RSA",
      "n": "0OYUP7JyD3YoshRV5jdxofZF2LwdW8AfQr7Ka0MqBxRfIteETF6CSZv-k_-2EGpvunQGctLSgvhLeNsrNmTJ_YCa-uz3t0yEqtrCMez4CfuBHfAC2VYCTbQDoqRpogJQw12XfYMVTFTrJKD9blFMLQj6lczFP1DNERZzkGOicSv8Q7JCUDX85_1g4WxGAElhah6kYJ53bfbTZHDWZAMi1NvygvARCd_Mb7HDMcBSTofgJy88ZqVwOc0Coczn6FHtnkfhEBWXWBQd2YBHAvPdBlIzwF7hK2aUEf7VAzn2JzRUi7kXpIPR8A-jU_WNwkzfFPbW-xG0djQqccSZ8lUZdQ",
      "e": "AQAB",
      "kid": "0"
    },
    {
      "kty": "RSA",
      "n": "0OYUP7JyD3YoshRV5jdxofZF2LwdW8AfQr7Ka0MqBxRfIteETF6CSZv-k_-2EGpvunQGctLSgvhLeNsrNmTJ_YCa-uz3t0yEqtrCMez4CfuBHfAC2VYCTbQDoqRpogJQw12XfYMVTFTrJKD9blFMLQj6lczFP1DNERZzkGOicSv8Q7JCUDX85_1g4WxGAElhah6kYJ53bfbTZHDWZAMi1NvygvARCd_Mb7HDMcBSTofgJy88ZqVwOc0Coczn6FHtnkfhEBWXWBQd2YBHAvPdBlIzwF7hK2aUEf7VAzn2JzRUi7kXpIPR8A-jU_WNwkzfFPbW-xG0djQqccSZ8lUZdQ",
      "e": "AQAB",
      "kid": "1"
    }
  ]
}
But if we try uploading this, it’ll tell us we need to upload a png. Let’s just change the filename from keys.json to keys.png and then upload that file as our profile.
Now we need to find where our uploaded file is stored locally on the server so we can change the jku to its path so that when it verifies our JWK it doesn’t use their keys.json but the one we uploaded. Good ol’ inspect element does the trick:
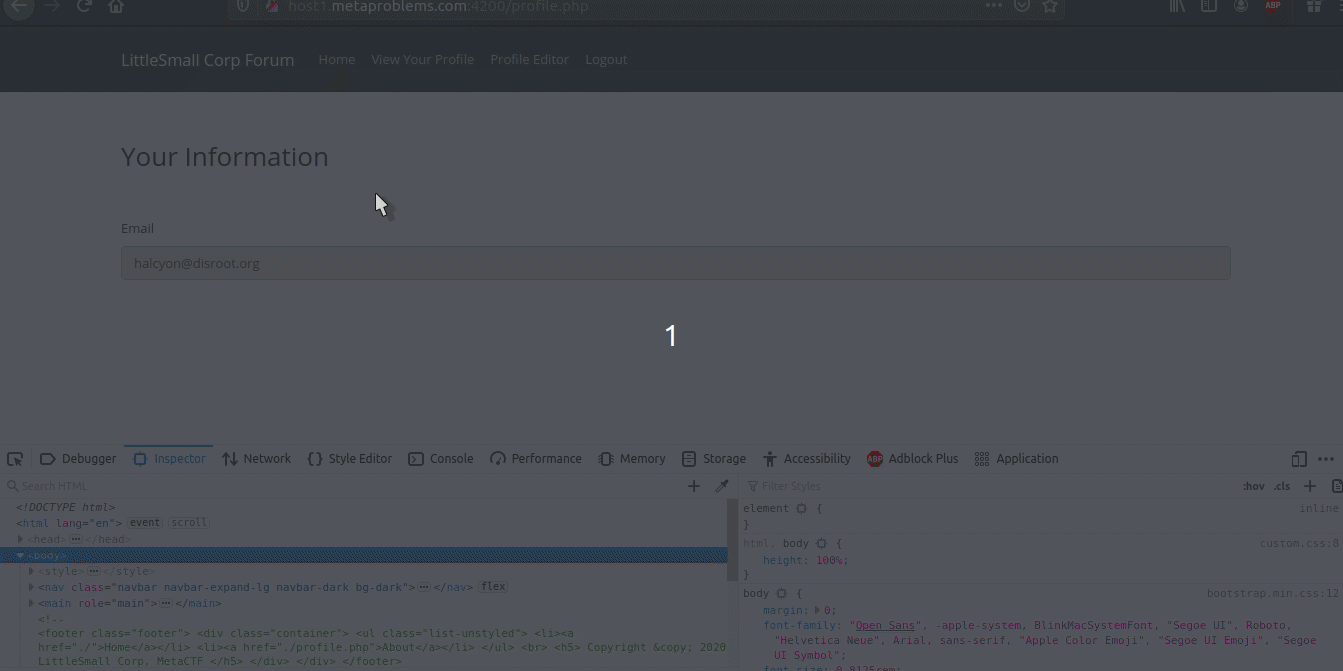
So our jku will be set to ./uploads/profile_images/4ZXMybrAyC.png. Following their format where jku: ./path.
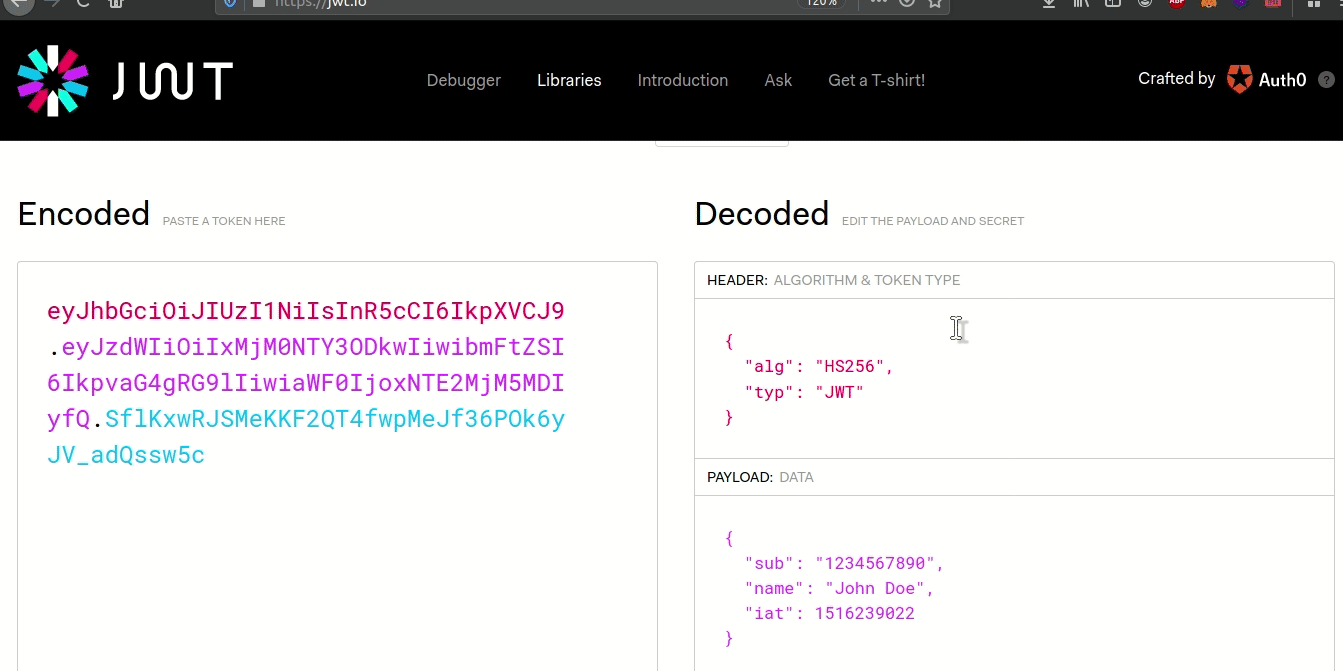
Time to crack our new JWT. Follow this gif to see how using https://jwt.io:
We forge it based on the JWT we already had for our user.
We also need to make sure the format is correct by meticulously comparing with the one they provided:
Now let’s visit the url to reset password except with the forged JWT:
MetaCTF{bringing_joy_to_all_one_forged_token_at_a_time}
Conclusion #
This CTF was super fun and I look forward to doing more with my team. I’ll also post more walkthroughs tomorrow.
-
From wikipedia: JSON Web Token (JWT, sometimes pronounced /dʒɒt/, the same as the English word “jot”[1]) is an Internet standard for creating data with optional signature and/or optional encryption whose payload holds JSON that asserts some number of claims. The tokens are signed either using a private secret or a public/private key. For example, a server could generate a token that has the claim “logged in as admin” and provide that to a client. The client could then use that token to prove that it is logged in as admin. The tokens can be signed by one party’s private key (usually the server’s) so that party can subsequently verify the token is legitimate. If the other party, by some suitable and trustworthy means, is in possession of the corresponding public key, they too are able to verify the token’s legitimacy. The tokens are designed to be compact,[2] URL-safe,[3] and usable especially in a web-browser single-sign-on (SSO) context. JWT claims can typically be used to pass identity of authenticated users between an identity provider and a service provider, or any other type of claims as required by business processes. ↩

